



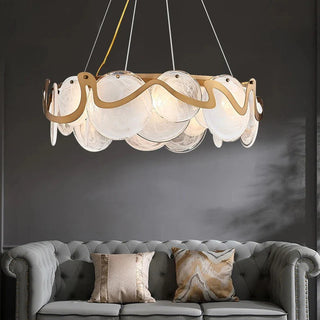

A custom chandelier can look exactly right in a rendering and still arrive with a canopy that crowds a ceiling medallion or a drop measured from the wrong surface. The shop drawing is where those differences become visible. Review it against the room dimensions and the latest written quote before anyone signs off.
Confirm which version you are reviewing
Keep the drawing number, revision date, and fixture name together. If the latest change was a narrower canopy, find the revised dimension on the plan view and check that the elevation still shows the expected drop. A change to one part can affect the position of another. Comparing marked-up revisions side by side makes it easier to see what actually changed.
Put each comment on the relevant view
Use the elevation for vertical dimensions, the plan view for shape and orientation, and a detail view for the connection between components. A comment such as “shift the long axis toward the window” needs an arrow or a labeled wall reference. A note that says “make it smaller” leaves several dimensions open to interpretation.
Read the installed dimensions in context
Compare the canopy width, widest point of the body, and overall installed drop. The widest decorative point may sit below the ceiling opening. A rectangular chandelier can also fit in two orientations on paper while only one aligns with the table. Confirm where the drawing starts its vertical measurement and what it includes at the bottom.
Example for a two-story entry
Suppose a room drawing measures from finished floor to ceiling, while the fixture elevation measures from the underside of the canopy to the lowest crystal. Before comparing the numbers, ask whether the canopy depth is included in the installed drop. The Piovara product drawing is a useful example of reading width, depth, and height as separate dimensions. Use the drawing for the exact configuration you intend to order.

Review the details that change the finished result
Look for a finish name or sample reference, the orientation of the canopy, and any visible differences in glass or crystal. If your electrician has asked about mounting, fixture weight, or control compatibility, request the relevant documentation for the chosen configuration and have them review it against the site conditions. For an asymmetric light, identify which side will face the entry or the main viewing position.
Send back one coordinated approval
Gather homeowner, designer, and installer comments on the same revision. Ask for any open items to be written into the next drawing or supporting specification. Save the final drawing together with the matching quote so there is a single reference for receiving and installation.

Start with a reference that suits the room
Compare staircase chandeliers and rectangular chandeliers to identify the overall form you want before discussing revisions. A marked room plan and a clear fixture reference give your project team a better basis for checking proportions.
Not sure which fixture fits your space?
Send room size, ceiling height and a photo. Our team will suggest sizes and models that fit your project.
Not sure which fixture fits your space?
Send room size, ceiling height and a photo. Our team will suggest sizes and models that fit your project.